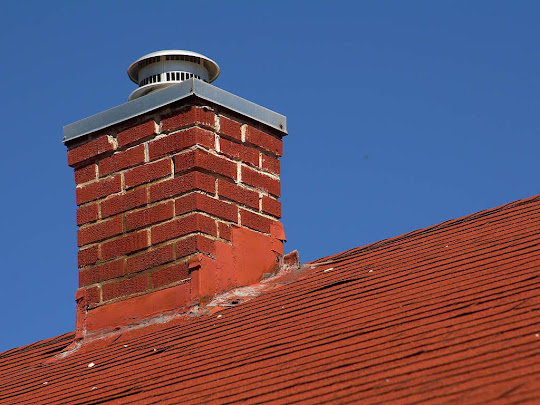
Signs Indicating It’s Time for Commercial Chimney Repairs
Maintaining a commercial chimney is crucial for the safety and efficiency of any business, yet determining when repairs are necessary can be challenging. Neglecting chimney issues can lead to hazardous consequences, affecting both the structure and those within the vicinity. In this guide, we’ll explore 15 key steps to help you assess whether your commercial chimney requires timely repair, ensuring a secure and reliable environment for your enterprise. If you ever find yourself in need, a professional chimney repair service can provide the expertise and assistance required to address any issues promptly.
- 1. Examine Exterior: Rigorously inspect the chimney’s outer surface, paying close attention to visible cracks, crumbling, or any signs of wear that may compromise its structural integrity. Utilize binoculars for a detailed view, ensuring no subtle damages go unnoticed. Take note of any discoloration, as it may indicate underlying issues.
- 2. Check Mortar Joints: Systematically assess mortar joints for gaps or erosion, meticulously running your fingers along each joint. Probe areas of concern with a small tool to determine the depth of any deterioration. Create a comprehensive record of mortar conditions, specifying locations that require immediate attention.
- 3. Inspect Interior Walls: Thoroughly examine the interior for creosote buildup, a potential fire hazard resulting from incomplete combustion. Use a flashlight and mirror to inspect corners and angles, ensuring a comprehensive evaluation. Document any irregularities and, if possible, measure the thickness of creosote deposits.
- 4. Evaluate Bricks: Scrutinize individual bricks for spalling or deterioration, considering both the chimney’s aesthetics and functionality. Employ a small hammer to tap on suspicious areas gently, listening for hollow sounds that may indicate internal damage. Promptly address any compromised bricks to prevent further structural issues.
- 5. Review Flashing: Examine chimney flashing meticulously for gaps or damage. Ensure it seamlessly integrates with the roof, leaving no vulnerabilities for water infiltration. Pay attention to the flashing’s condition around joints and seams, and promptly address any issues to prevent water damage.
- 6. Chimney Cap Inspection: Methodically inspect the chimney cap for proper functionality, ensuring it securely covers the chimney opening. Look for any rust, cracks, or deformities, as a damaged cap can allow water and debris entry. Verify that the cap’s mesh effectively prevents the entry of animals and debris.
- 7. Assess Chimney Crown: Carefully examine the chimney crown for cracks or deterioration. Consider applying a water-repellent sealant to enhance its longevity and protective properties. Take note of any standing water on the crown, as this could indicate drainage issues that require immediate attention.
- 8. Flue Tile Examination: Check flue tiles for cracks or damage, using a flashlight and mirror to inspect hard-to-reach areas. Ensure proper alignment and seal between tiles to maintain efficient ventilation. Address any issues promptly to prevent hazards associated with gas leakage or blockages.
- 9. Look for Stains: Thoroughly inspect both interior and exterior surfaces for water stains, which may indicate potential leaks. Trace the source of stains to determine the extent of water damage and promptly address any vulnerabilities in the chimney structure or flashing.
- 10. Evaluate Soot Buildup: Monitor soot buildup within the chimney, considering both safety and functionality. Regularly clean the flue to prevent excessive accumulation, which can hinder proper ventilation and pose a heightened fire risk. Document the frequency and extent of soot buildup for ongoing maintenance.
- 11. Consider Animal Intrusions: Inspect for signs of animal entry, such as nesting materials, which can block ventilation and compromise safety. Seal any openings or install protective barriers to prevent future intrusions, ensuring a secure and animal-free chimney environment.
- 12. Assess Damper Functionality: Ensure the damper opens and closes correctly, addressing any issues affecting proper airflow and efficiency. For smooth functioning, lubricate hinges and moving parts as necessary. Test the damper in various conditions to verify its responsiveness.
- 13. Check for Leaning: Investigate any noticeable leaning or tilting of the chimney structure, as it may indicate foundation problems. Measure the degree of lean and consult with a structural engineer to determine the appropriate corrective actions. Promptly address foundation issues to prevent further structural damage.
- 14. Evaluate Smoke: Observe smoke while the fireplace is in use, focusing on any unusual patterns that may signal ventilation or drafting issues. Note the color and density of the smoke, as changes may indicate incomplete combustion or blockages. Promptly address any smoke irregularities to ensure optimal chimney performance.
- 15. Schedule Professional Inspection: When in doubt or to ensure a comprehensive evaluation, engage a qualified professional for a detailed inspection. Provide the professional with the documented findings from your assessment, allowing for a thorough understanding of the chimney’s condition and identification of hidden or complex problems.
.jpg)
.jpg)
.jpg)

Comments
Post a Comment